How to
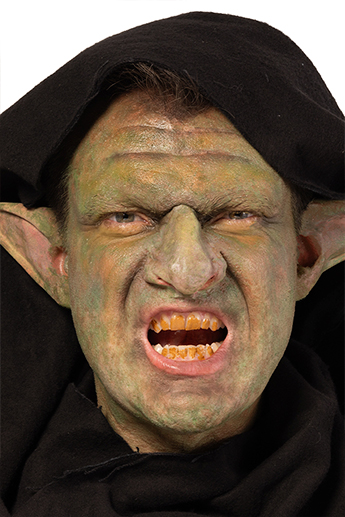
Goblin
Step 1
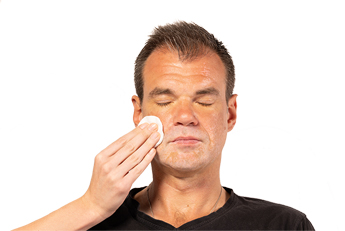
It's important to start with freshly cleansed skin to create a clean base. Begin by applying Clean & Care Natural Micellar Water 120 ml to a soft cotton pad. Gently sweep the pad all over your face and neck. Ensure that you effectively remove any make-up or impurities from your skin.
It's important to start with freshly cleansed skin to create a clean base. Begin by applying Clean & Care Natural Micellar Water 120 ml to a soft cotton pad. Gently sweep the pad all over your face and neck. Ensure that you effectively remove any make-up or impurities from your skin.
Step 2
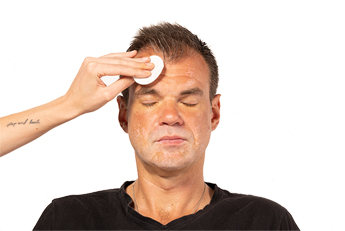
To prep your skin further, soak another cotton pad with a small amount of Isopropyl Alcohol 50 ml. Carefully swipe this pad over your forehead and cheeks. Avoid the eye and mouth areas, as alcohol can be harsh on these sensitive regions. This step is essential for additional eliminating any residual surface oils, allowing your make-up to adhere better.
To prep your skin further, soak another cotton pad with a small amount of Isopropyl Alcohol 50 ml. Carefully swipe this pad over your forehead and cheeks. Avoid the eye and mouth areas, as alcohol can be harsh on these sensitive regions. This step is essential for additional eliminating any residual surface oils, allowing your make-up to adhere better.
Step 3
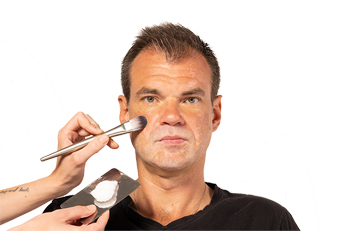
Prior to applying any adhesive or prosthetic, it's crucial to safeguard your skin. Apply a layer of Marly Skin - Skin Protection Foam evenly over your face.
This protective barrier will shield your skin from potential irritation that may be caused by the adhesive.
Prior to applying any adhesive or prosthetic, it's crucial to safeguard your skin. Apply a layer of Marly Skin - Skin Protection Foam evenly over your face.
This protective barrier will shield your skin from potential irritation that may be caused by the adhesive.
Step 4
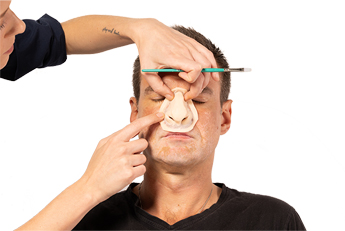
Now, it's time to attach the prosthetic. Begin by applying Pros-Aide - The Original - 15 ml to both your nose and the inner side of the prosthetic piece. Press the prosthetic firmly onto your skin, ensuring it adheres securely.
Take your time with this step to achieve a seamless blend.
Now, it's time to attach the prosthetic. Begin by applying Pros-Aide - The Original - 15 ml to both your nose and the inner side of the prosthetic piece. Press the prosthetic firmly onto your skin, ensuring it adheres securely.
Take your time with this step to achieve a seamless blend.
Step 5
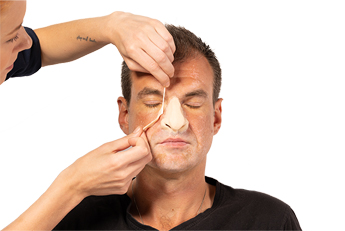
Flashing Removal: To refine the prosthetic's edges, take a small amount of Acetone 100 ml onto a Q-Tip and gently dissolve any flashing or excess material from the prosthetic. This will help create a smoother transition between the prosthetic and your skin.
Flashing Removal: To refine the prosthetic's edges, take a small amount of Acetone 100 ml onto a Q-Tip and gently dissolve any flashing or excess material from the prosthetic. This will help create a smoother transition between the prosthetic and your skin.
Step 6
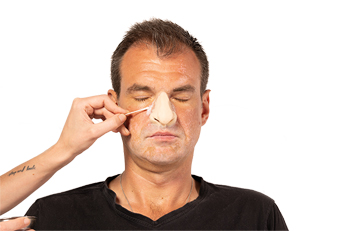
Achieve a flawless integration by mixing Kryosil Thickening Agent 10 g with Pros-Aide - The Original - 15 ml until it reaches a cream-like consistency.
Apply this mixture meticulously around the edges of the prosthetic.
This additional layer ensures a secure attachment and a natural appearance.
Achieve a flawless integration by mixing Kryosil Thickening Agent 10 g with Pros-Aide - The Original - 15 ml until it reaches a cream-like consistency.
Apply this mixture meticulously around the edges of the prosthetic.
This additional layer ensures a secure attachment and a natural appearance.
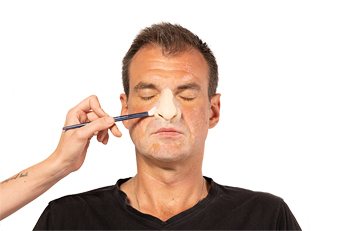
Step 7
To reduce the tackiness of the Pros-Aide - The Original - 15 ml and set the prosthetic in place, dust a layer of Translucent Powder 50 g (TL 1) evenly over the prosthetic and the surrounding skin.
To reduce the tackiness of the Pros-Aide - The Original - 15 ml and set the prosthetic in place, dust a layer of Translucent Powder 50 g (TL 1) evenly over the prosthetic and the surrounding skin.
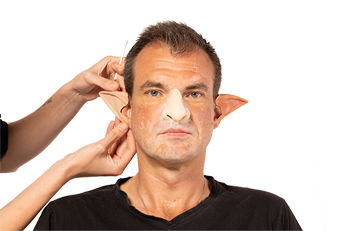
Step 8
Repeat the prosthetic application process from step 4 for the ear fitting. Begin by applying Pros-Aide - The Original - 15 ml to both your ears and the inner side of the prosthetic piece. Press firmly once more to ensure a solid bond between the two surfaces.
Repeat the prosthetic application process from step 4 for the ear fitting. Begin by applying Pros-Aide - The Original - 15 ml to both your ears and the inner side of the prosthetic piece. Press firmly once more to ensure a solid bond between the two surfaces.
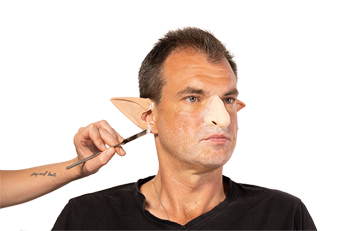
Step 9
Repeat the blending process as in step 6 by mixing Kryosil Thickening Agent 10 g with Pros-Aide - The Original - 15 ml to maintain a cream consistency. Apply this mixture once again around the edges of the prosthetic to ensure it seamlessly merges with your skin.
Repeat the blending process as in step 6 by mixing Kryosil Thickening Agent 10 g with Pros-Aide - The Original - 15 ml to maintain a cream consistency. Apply this mixture once again around the edges of the prosthetic to ensure it seamlessly merges with your skin.
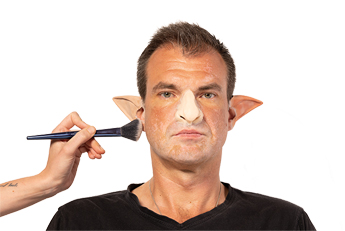
Step 10
To eliminate any remaining tackiness from the Pros-Aide - The Original - 15 ml, generously applyTranslucent Powder 50 g (TL 1) to set the prosthetic and the surrounding areas.
To eliminate any remaining tackiness from the Pros-Aide - The Original - 15 ml, generously applyTranslucent Powder 50 g (TL 1) to set the prosthetic and the surrounding areas.
Step 11
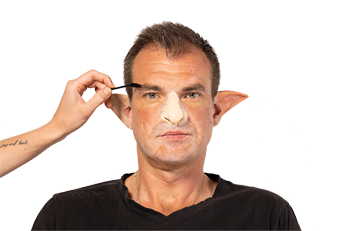
Begin preparing your eyebrows for the goblin-like look. Apply a small amount of Pros-Aide - The Original - 15 ml and use a brush to flatten your eyebrows against your skin, ensuring they lay flat.
Begin preparing your eyebrows for the goblin-like look. Apply a small amount of Pros-Aide - The Original - 15 ml and use a brush to flatten your eyebrows against your skin, ensuring they lay flat.
Step 12
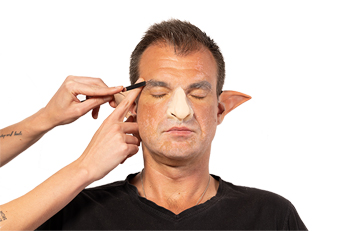
Now, on top, apply Eyebrow Plastic onto your flattened eyebrows using a Make-up Mixing Spatula. Smoothly press them against your skin for a more seamless surface.
Now, on top, apply Eyebrow Plastic onto your flattened eyebrows using a Make-up Mixing Spatula. Smoothly press them against your skin for a more seamless surface.
Step 13
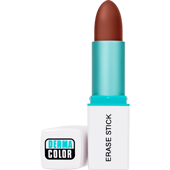
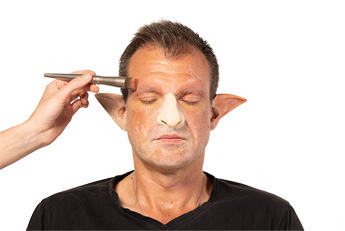
To blend your flattened eyebrows with the rest of your skin, apply Dermacolor Camouflage Creme Erase Stick (D 31) or any other matching shade. This step ensures a consistent base.
To blend your flattened eyebrows with the rest of your skin, apply Dermacolor Camouflage Creme Erase Stick (D 31) or any other matching shade. This step ensures a consistent base.
Step 14
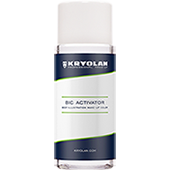
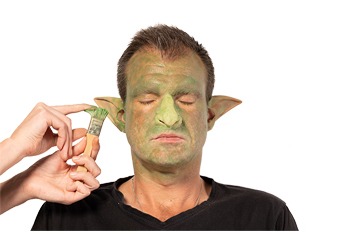
To add texture and depth to your goblin-like appearance, use the Body Illustration Make-up Color Palette 10 Colors (Bright). Activate the colors by using the BIC Activator. Pick up the shades 512, Green 42, and 509 and use a chip brush to splatter these colors onto your skin. This step will create a realistic, uneven skin texture for your goblin character.
To add texture and depth to your goblin-like appearance, use the Body Illustration Make-up Color Palette 10 Colors (Bright). Activate the colors by using the BIC Activator. Pick up the shades 512, Green 42, and 509 and use a chip brush to splatter these colors onto your skin. This step will create a realistic, uneven skin texture for your goblin character.
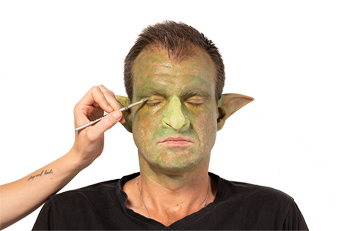
Step 15
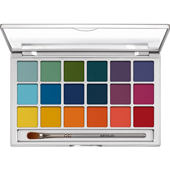
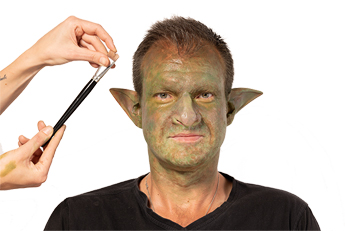
Next, begin working on your eye make-up. Apply 512 from the Coloring Vision Palette 18 Colors (Effects) onto your eyelids.
This adds a vibrant, goblin-like touch to your eyes.
Next, begin working on your eye make-up. Apply 512 from the Coloring Vision Palette 18 Colors (Effects) onto your eyelids.
This adds a vibrant, goblin-like touch to your eyes.
Step 16
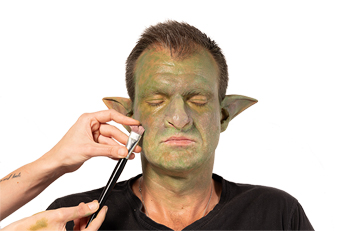
Continue enhancing depth by splattering 043 and 101 from the Body Illustration Make-up Color Palette 10 Colors (Bright) onto your skin.
These darker shades create shadows and complexity in your goblin look.
Continue enhancing depth by splattering 043 and 101 from the Body Illustration Make-up Color Palette 10 Colors (Bright) onto your skin.
These darker shades create shadows and complexity in your goblin look.
Step 17
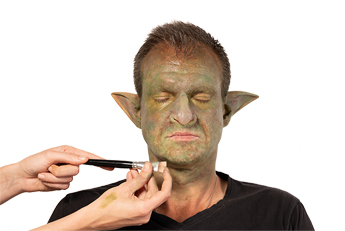
For highlighting, use the Body Illustration Make-up Color Palette 10 Colors (Bright) once more and splatter R21 to emphasize key areas on your face.
This will bring attention to the high points of your goblin-like make-up.
For highlighting, use the Body Illustration Make-up Color Palette 10 Colors (Bright) once more and splatter R21 to emphasize key areas on your face.
This will bring attention to the high points of your goblin-like make-up.
Step 18
To further enhance realism, splatter color 1 W from the Body Illustration Make-up Color Set 18 Colors (Flesh) onto your skin.
This adds subtle imperfections and depth.
To further enhance realism, splatter color 1 W from the Body Illustration Make-up Color Set 18 Colors (Flesh) onto your skin.
This adds subtle imperfections and depth.
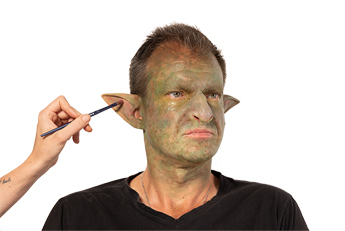
Step 19
Paint color 085 from the Coloring Vision Palette 18 Colors (Effects) into the ear prosthetics. Use a brush of your choice and dap on the color.
This step adds a goblin-like touch to your ears.
Paint color 085 from the Coloring Vision Palette 18 Colors (Effects) into the ear prosthetics. Use a brush of your choice and dap on the color.
This step adds a goblin-like touch to your ears.
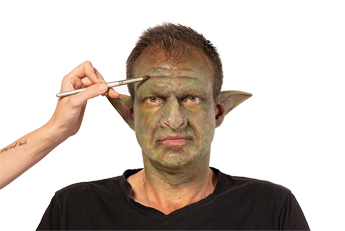
Step 20
Use Eye Shadow Variety 18 Colors (V 5) in color 102 to define your facial features.
With the help of a brush, apply this shade to the natural lines and contours of your face, creating more depth and dimension.
This step adds character to your goblin look.
Use Eye Shadow Variety 18 Colors (V 5) in color 102 to define your facial features.
With the help of a brush, apply this shade to the natural lines and contours of your face, creating more depth and dimension.
This step adds character to your goblin look.
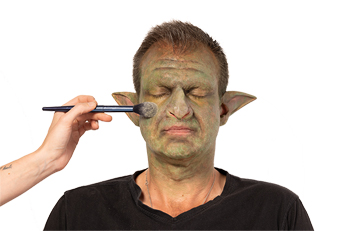
Step 21
To set your make-up and eliminate any shine, apply Translucent Powder 50 g (TL 1) all over your face.
Ensure it is evenly distributed for a long-lasting finish. Dust off any excess powder.
To set your make-up and eliminate any shine, apply Translucent Powder 50 g (TL 1) all over your face.
Ensure it is evenly distributed for a long-lasting finish. Dust off any excess powder.
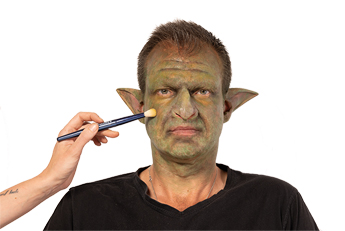
Step 22
Apply Eye Shadow Variety 18 Colors (V 2) in the color lemon as a highlighter to accentuate specific areas, such as your cheekbones and brow bones.
Apply Eye Shadow Variety 18 Colors (V 2) in the color lemon as a highlighter to accentuate specific areas, such as your cheekbones and brow bones.
Step 23
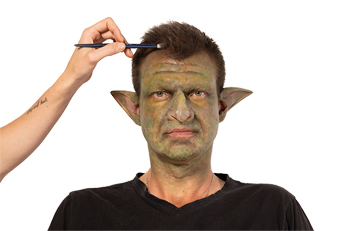
For added realism, use Eye Shadow Variety 18 Colors (V 5) in the color 102 to apply detail to your hairline, making it blend seamlessly with the goblin make-up.
For added realism, use Eye Shadow Variety 18 Colors (V 5) in the color 102 to apply detail to your hairline, making it blend seamlessly with the goblin make-up.
Step 24
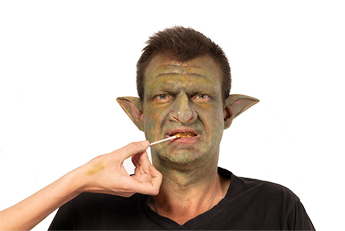
Lastly, create a finishing touch by drying your teeth with a tissue and then applying Tooth Enamel (nicotine) with a Q-tip. This will give your teeth a goblin-like appearance and complete your spooky look.
Lastly, create a finishing touch by drying your teeth with a tissue and then applying Tooth Enamel (nicotine) with a Q-tip. This will give your teeth a goblin-like appearance and complete your spooky look.
Final

